Easy Baked Honey Garlic Chicken: Your New Weeknight Go-To
In the whirlwind of busy weeknights, the search for a meal that's both deeply satisfying and wonderfully simple can often feel like an impossible quest. But what if we told you there’s a dish that consistently delivers on flavor, convenience, and universal family appeal? Enter baked honey garlic chicken – a culinary hero that promises to transform your dinner routine from stressful to sensational. Imagine walking into your kitchen, greeted by the irresistible aroma of sweet honey, savory soy, and aromatic garlic, knowing that a tender, glistening, and perfectly caramelized chicken dish is just minutes away. This isn't just a recipe; it's a solution, a comfort, and quite possibly, your new favorite go-to.
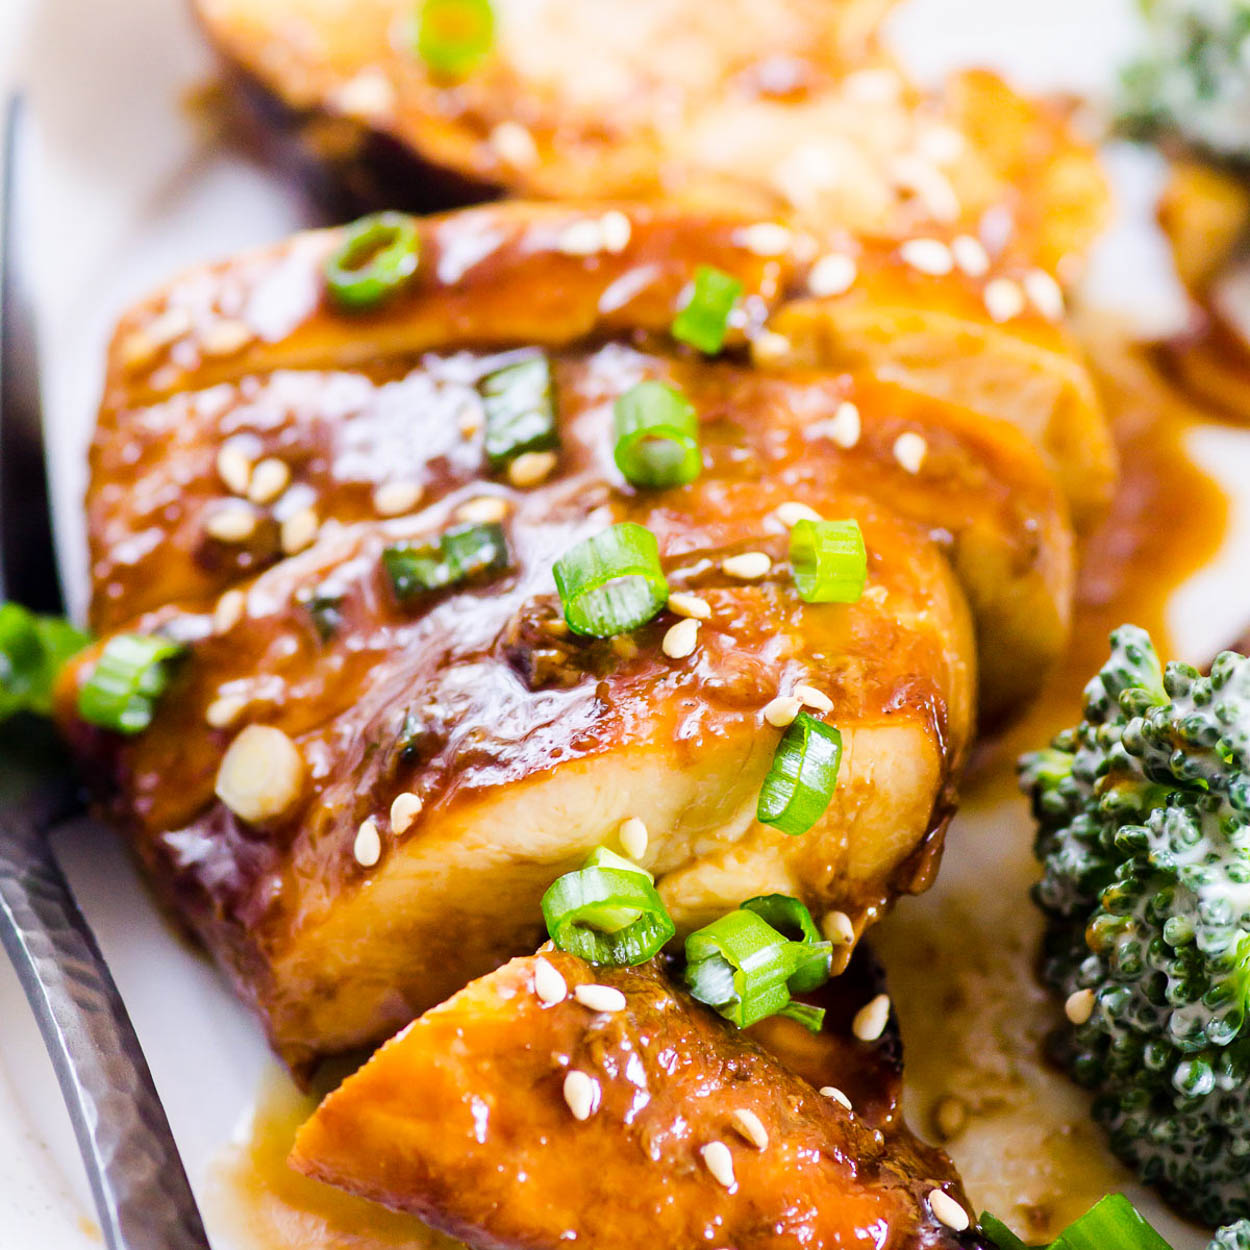
For many, this dish has already achieved staple status, winning over even the most discerning palates. Picky eaters who usually eye chicken with suspicion somehow devour every last bite when it’s coated in this delectable honey garlic glaze. Even self-proclaimed grilling enthusiasts have been known to prefer this oven-baked marvel over their beloved BBQ. The secret lies in its effortless preparation combined with an explosion of balanced flavors that make every bite a pure delight. It’s the kind of meal that makes you feel like a gourmet chef without any of the fuss – truly a toss-it-in-the-oven-and-forget-about-it experience, perfect for families juggling countless commitments or anyone who simply appreciates delicious food without the complex culinary acrobatics. We even have a dedicated article for those aiming to satisfy the little ones: Picky Eater Approved: Juicy Baked Honey Garlic Chicken Recipe.
The Magic Behind the Marinade: Crafting Irresistible Flavor
The heart and soul of our easy baked honey garlic chicken lies in its vibrant, perfectly balanced marinade. This isn't just a coating; it's a flavor infuser, tenderizer, and the secret behind that mouth-watering caramelized finish. Let's break down the key players in this magical mixture and why each ingredient earns its place:
- Honey: Beyond its natural sweetness, honey is crucial for that beautiful golden-brown caramelization that forms on the chicken skin as it bakes. It creates a sticky, delicious glaze that truly sets this dish apart. Any local, raw, or wildflower honey will work wonders, each adding its own subtle character.
- Soy Sauce: The backbone of savory umami and saltiness. It penetrates the chicken, seasoning it from within. We highly recommend using low-sodium soy sauce to give you more control over the salt levels and prevent the dish from becoming overly salty. For those with gluten sensitivities, tamari is an excellent gluten-free alternative that delivers the same depth of flavor.
- Minced Garlic: Freshly minced garlic is non-negotiable here. While pre-minced garlic can save time, the robust, pungent aroma and flavor of fresh garlic truly elevate the dish. Don't be shy; a generous amount of garlic is what gives this chicken its signature punch.
- Olive Oil: Acts as an emulsifier, helping to bind all the marinade ingredients together and ensuring they adhere beautifully to the chicken. It also contributes to moisture and helps in creating a lovely crust.
- Apple Cider Vinegar (ACV): A splash of ACV might seem surprising, but it's a game-changer. Its acidity helps to tenderize the chicken fibers, making the meat incredibly juicy. More importantly, it cuts through the richness and sweetness of the honey and soy, balancing the flavors perfectly.
- Sesame Oil: A little goes a long way! Toasted sesame oil adds a distinct, nutty, aromatic depth that hints at Asian-inspired flavors and makes the dish feel incredibly sophisticated.
- Grated Ginger: Freshly grated ginger adds a zesty, warm, and slightly peppery note that complements the garlic and honey beautifully. It brightens the entire marinade.
- Red Pepper Flakes (Optional): For those who appreciate a touch of heat, a pinch or two of red pepper flakes adds a subtle warmth without overpowering the other flavors. Adjust to your personal preference!
Once you've gathered your ingredients, simply whisk them together in a medium-sized mixing bowl until well combined. This ensures every component is evenly distributed, ready to infuse your chicken with maximum flavor.
Choosing and Marinating Your Chicken
While this recipe works wonderfully with both chicken breasts and thighs, chicken thighs are often recommended for their inherent juiciness and higher fat content, which makes them more forgiving and flavorful, especially under high heat. They also tend to caramelize beautifully. If opting for chicken breasts, consider flattening them slightly to an even thickness to ensure uniform cooking and prevent drying out.
Place your chosen chicken pieces into the bowl with the prepared marinade. Using tongs or clean hands, toss the chicken to coat every piece thoroughly. The longer you marinate, the deeper the flavor penetration and the more tender your chicken will be. While a minimum of 30 minutes at room temperature will still yield delicious results, aiming for 2-4 hours in the refrigerator is ideal. For truly unparalleled flavor and tenderness, consider marinating the chicken overnight. If marinating in the fridge, allow the chicken to sit at room temperature for about 20-30 minutes before baking; this ensures more even cooking.
From Prep to Perfection: Baking Your Honey Garlic Chicken
The beauty of this baked honey garlic chicken lies in its simplicity from start to finish. Once your chicken is marinated, the oven does most of the heavy lifting. Here’s how to achieve that glistening, juicy, and perfectly cooked result every time:
- Preheat Your Oven: Start by preheating your oven to a robust 400°F (200°C). This temperature is crucial for ensuring the chicken cooks through efficiently while simultaneously developing that desirable golden-brown, caramelized exterior.
- Prepare Your Baking Dish: Select a 9x13 inch baking dish or a similarly sized oven-safe dish. Lightly grease the dish with cooking spray or a small amount of olive oil. This step is twofold: it prevents the chicken from sticking to the bottom during baking and makes cleanup significantly easier afterward.
- Arrange the Chicken: Carefully remove the marinated chicken from the bowl and arrange it in a single layer in the prepared baking dish. It’s important to avoid overcrowding the dish. Giving each piece a little space allows for better air circulation, which promotes even cooking and encourages that beautiful caramelization. Any remaining marinade in the bowl can be drizzled over the chicken in the dish – don't let that flavor go to waste!
- Bake to Glistening Perfection: Place the baking dish in the preheated oven.
- For chicken thighs, bake for approximately 25-35 minutes.
- For chicken breasts, baking time will be slightly shorter, around 20-25 minutes.
- Rest Before Serving: Once baked, remove the chicken from the oven and let it rest in the baking dish for 5-10 minutes before serving. This crucial step allows the juices to redistribute throughout the meat, ensuring every bite is incredibly tender and moist.
As the chicken rests, you’ll notice the sauce in the baking dish may thicken further, transforming into a rich, glossy glaze. Spoon this extra sauce generously over the chicken and any accompanying sides for an added burst of flavor.
Serving Suggestions & Customization: Beyond the Basic Plate
One of the many charms of baked honey garlic chicken is its versatility. It's a star on its own, but it truly shines when paired with complementary sides. Here are some ideas to complete your meal:
- Rice or Grains: Classic pairings include fluffy white rice (jasmine or basmati), brown rice, quinoa, or even couscous. They absorb the extra honey garlic sauce beautifully, making for a satisfying base.
- Roasted Vegetables: For a complete sheet-pan meal, you can often roast vegetables alongside your chicken. Broccoli florets, asparagus spears, bell pepper strips, or even chunks of carrots and potatoes toss with a little olive oil, salt, and pepper, and add to the baking dish during the last 15-20 minutes of cooking.
- Steamed Greens: A simple side of steamed green beans, spinach, or kale provides a fresh contrast to the rich chicken.
- Fresh Salad: A crisp green salad with a light vinaigrette offers a refreshing counterpoint and adds a welcome crunch.
- Mashed Potatoes: Creamy mashed potatoes make a comforting pairing, perfect for soaking up every drop of that delicious honey garlic glaze.
Customizing Your Honey Garlic Experience
While the base recipe is fantastic as is, don't hesitate to experiment and make it your own:
- Amp Up the Heat: For spice lovers, add a dash of sriracha or a few extra pinches of red pepper flakes to the marinade.
- Citrus Zing: A squeeze of fresh lime or lemon juice over the chicken after baking can add a bright, zesty finish.
- Herbaceous Touch: Garnish with fresh chopped cilantro or parsley for a pop of color and fresh herbal notes.
- Pineapple Power: For a tropical twist, add chunks of fresh pineapple to the baking dish alongside the chicken during the last 15 minutes of baking. The pineapple will caramelize and release its juices, adding another layer of sweet and tangy flavor.
- Thick Glaze: If you desire an even thicker glaze for drizzling, transfer any leftover sauce from the baking dish to a small saucepan after removing the chicken. Bring it to a simmer over medium heat and cook for a few minutes, stirring constantly, until it reduces and thickens to your desired consistency. (Note: If the marinade touched raw chicken, ensure it boils vigorously for at least 1 minute to be safe.)
Leftovers, if any, are equally delightful! Store them in an airtight container in the refrigerator for up to 3-4 days. Reheat gently in the microwave or, for best texture, in a preheated oven until warmed through.
Your New Favorite Family Meal Awaits!
There you have it – the comprehensive guide to creating the most delectable, stress-free baked honey garlic chicken. This dish embodies everything you could want in a weeknight meal: incredible flavor that appeals to everyone, minimal effort, and a comforting warmth that fills your home. From its perfectly balanced sweet and savory marinade to the juicy, caramelized chicken emerging from your oven, every step of this recipe is designed for success.
So, the next time you find yourself wondering what to make for dinner, remember this reliable, crowd-pleasing option. With its irresistible aroma and unforgettable taste, this easy baked honey garlic chicken isn't just a meal; it's an experience that will undoubtedly become a treasured staple in your culinary repertoire. Go ahead, give it a try – your taste buds, and your busy schedule, will thank you!
